IP ADRESS SETUP | HOW TO CONNECT KONICA MINOLTA 215 / 226 / 206 / 205i / 225i THROUGH NETWORK

Here’s an overview:
- Introduction to Konica Minolta Bizhub Series
- Understanding the Basics of IP Addressing
- Preparation: Necessary Equipment and Information
- Establishing a Connection: Initial Steps
- Accessing the Printer Web Interface
- Configuring Network Settings on Konica Minolta
- Assigning a Static IP Address to Your Konica Minolta Printer
- Testing the Connection and Troubleshooting Common Issues
- Installing Printer Drivers on Workstations
- Setting Up Printing Preferences and Security Features
- Maintaining Your Networked Konica Minolta Printer
- Advanced Networking: Connecting to Multiple Networks
- Conclusion: Optimizing Your Konica Minolta Experience for Office Efficiency
Introduction to Konica Minolta Bizhub Series
Konica Minolta’s Bizhub series represents a cornerstone in the landscape of modern office printers, bringing together a blend of innovation and functionality to meet the dynamic needs of businesses. As organizations strive to maximize efficiency, a focus has been placed on leveraging the top benefits of using cloud-based printer monitoring systems. This shift is evident in the Bizhub series, which offers a range of sophisticated multi-function printers designed to optimize workflows and boost productivity.
In an age where maximizing printer performance while ensuring network security is paramount, the Bizhub series stands out. It is engineered to integrate seamlessly with printer counter and alert software, ensuring that businesses can monitor and manage their print environments more effectively. This is not only instrumental for operational efficiency but also for maintaining stringent security protocols.
The Bizhub range, including models such as the 215, 226, 206, 205i, and 225i, is designed for intuitive use and robust performance. Each model features advanced capabilities tailored to meet the demands of the modern workplace. The future of enhanced printer security leveraging cloud-based monitoring is embodied within the Bizhub series, with each device providing reliable service that businesses can trust.
By connecting Konica Minolta Bizhub printers through a network, users can enjoy the advantages of centralized control and reduced maintenance hassles. This step forward in digital connectivity aims to elevate organizational effectiveness by streamlining processes and enabling a more agile response to print-related tasks. The following guide will delve into the specifics of IP address setup to ensure that your Konica Minolta Bizhub device is network-ready and fully operational.
Understanding the Basics of IP Addressing
When configuring Konica Minolta printers such as models 215, 226, 206, 205i, or 225i for network connectivity, it is crucial to grasp the rudiments of IP addressing. An IP address is a unique identifier assigned to every device on a network, enabling it to communicate with other devices.
IP addresses come in two primary versions: IPv4 and IPv6. IPv4 is the most commonly used format, consisting of four octets (e.g., 192.168.1.1), while IPv6 addresses are longer, catering to the expansive needs of modern networks (e.g., 2001:0db8:85a3:0000:0000:8a2e:0370:7334).
Here are critical points to understand about IP addressing:
- Uniqueness: Each device must have a unique IP to avoid conflicts, which could lead to communication failures.
- Static vs. Dynamic: IP addresses can be static (permanently assigned to a printer) or dynamic (assigned temporarily by a DHCP server).
- Subnet Mask: Alongside the IP, a subnet mask defines the network’s scale and the available host addresses within it.
- Default Gateway: This is the access point a printer uses to send data to devices outside of its local network.
- DNS Servers: These translate domain names into IP addresses, a key step if the printer needs to access internet-based services.
Understanding IP addressing is a foundational aspect of maximizing printer performance while ensuring network security. It is also indispensable for top benefits of using cloud-based printer monitoring systems, which can streamline management and support the future of enhanced printer security leveraging cloud-based monitoring. Additionally, setting the correct IP parameters is essential to maximize efficiency with printer counter and alert software, ensuring that the printers are not just connected, but also monitored and managed effectively.
Preparation: Necessary Equipment and Information
Before beginning the IP address setup for connecting Konica Minolta printers (models 215, 226, 206, 205i, 225i) through a network, it’s essential to accumulate the necessary equipment and information. Properly preparing can maximize printer performance and ensure network security, providing the top benefits of using cloud-based printer monitoring systems. Here is a detailed list of what you’ll need:
- Konica Minolta Printer: Ensure that the printer is operational and has no pending hardware issues.
- Network Router or Switch: A stable and secure network is crucial for connecting the printer.
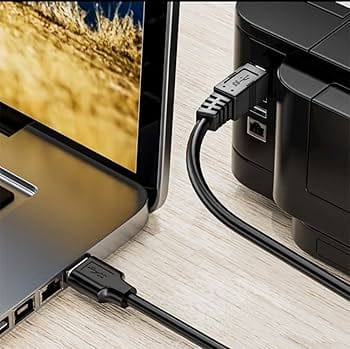
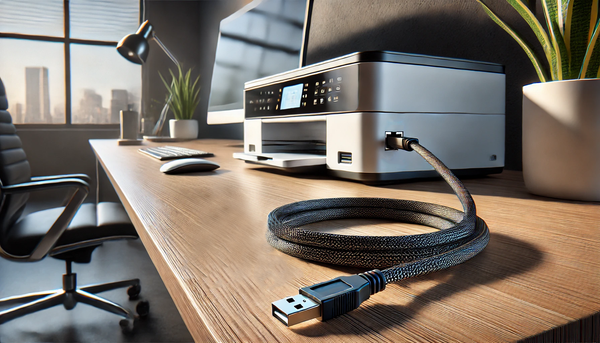
- Ethernet Cable: An Ethernet cable to connect the printer to the network router or switch.
- Computer or Server: A device to access the printer’s network settings, typically a computer or dedicated server.
- Network Credentials: Network SSID, security key, and administrative access for making changes to the network settings.
- Printer IP Address: Access to a range of valid IP addresses within your network to assign to the printer.
- Subnet Mask and Gateway Information: Required when setting up the printer on a Local Area Network (LAN).
- Konica Minolta Printer Software: Latest printer drivers and configuration utilities, downloadable from the Konica Minolta website.
- Printer Manual: The manual contains specific instructions for your Konica Minolta model, useful for troubleshooting.
Gather the following information to leverage the future of enhanced printer security with cloud-based monitoring:
- Network Interface Card (NIC) IP Address: For remote monitoring and accessing the printer web interface.
- MAC Address: Essential for network filtering and MAC address reservations.
- Printer Counter and Alert Software: For those aiming to maximize efficiency, ensure that relevant software is installed to manage printer counters and receive alerts for maintenance or issues.
Once all equipment and information have been assembled, proceed to the connection and configuration phase, abiding by best practices to maintain the integrity and security of your network infrastructure.
Establishing a Connection: Initial Steps
When integrating printers like the Konica Minolta 215, 226, 206, 205i, or 225i into a network, it is essential to follow preliminary steps to ensure a smooth setup process. This approach not only maximizes printer performance but also emphasizes the importance of network security, which is crucial for leveraging the future of enhanced printer security with cloud-based monitoring systems.
- Preparation:
- Verify that the Konica Minolta printer is powered on and operational.
- Gather the necessary network details, including IP address, subnet mask, and gateway information from your network administrator.
- Accessing Printer Interface:
- Access the printer’s onboard menu or web interface, typically via a button or screen on the printer itself. For web access, you may need the printer’s current IP address.
- Network Configuration:
- Within the interface, navigate to the ‘Network Settings’ or similar section.
- Configure the TCP/IP settings by entering the IP address, subnet mask, and default gateway that align with your network’s parameters.
- Enabling Cloud Services:
- If utilizing cloud-based printer monitoring systems, ensure that the relevant settings are enabled and configured within the printer’s network settings.
- This step is crucial for maximizing efficiency and benefiting from printer counter and alert software.
- Testing the Connection:
- Save the settings and print a test page to confirm network connectivity.
- Perform a connection test from a computer on the network to ensure that the printer is accessible.
By carefully executing these initial steps, users can effectively integrate their Konica Minolta printer into their network environment. The process not only helps to maintain optimal printer performance but also prepares the system to take advantage of the top benefits of using cloud-based printer monitoring systems. As businesses emphasize the need to maximize efficiency, these foundational measures contribute to a robust and secure printing network.
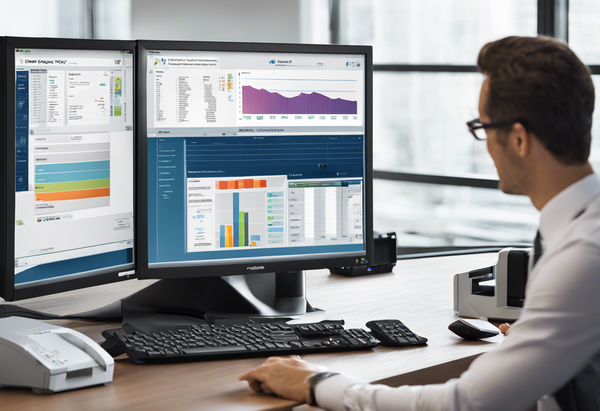
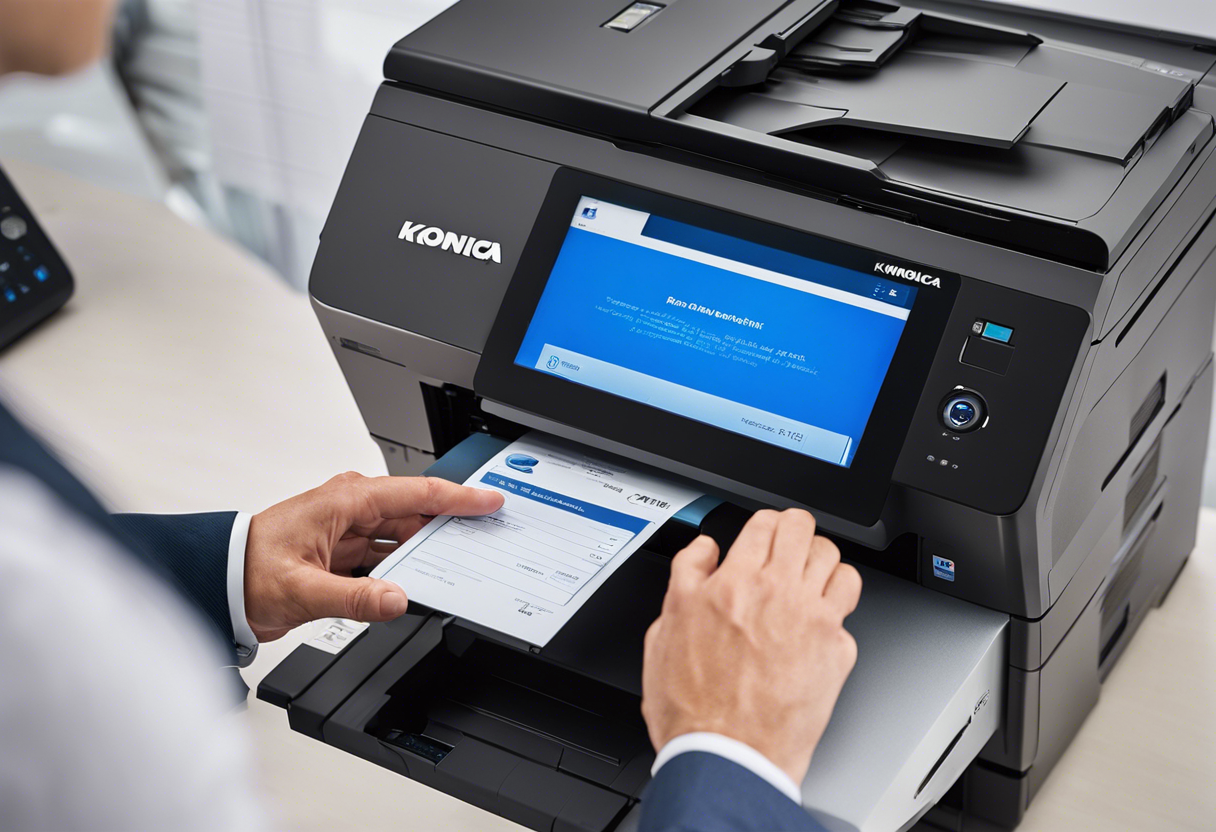
Accessing the Printer Web Interface
When seeking to enhance organizational efficiency and printer performance, accessing a printer’s web interface becomes a critical step, particularly for models such as the Konica Minolta 215 / 226 / 206 / 205i / 225i. This access paves the way for numerous functionalities, including the activation of top benefits of using cloud-based printer monitoring systems and the ability to maximize efficiency with printer counter and alert software.
To connect to your Konica Minolta printer through a network, follow these steps:
- Ensure the printer is connected to the network:
- Verify that the printer is properly connected to your local network through a wired Ethernet connection or via Wi-Fi, if available.
- Obtain the printer’s IP address:
- You can typically find the IP address on the printer’s display by navigating through the network or connectivity settings.
- Alternatively, print a configuration page from the printer, which will list the IP address.
- Access the printer web interface:
- Open a web browser on a computer that is connected to the same network.
- Enter the printer’s IP address into the browser’s address bar and press Enter.
- Log in to the printer’s web interface:
- You may be prompted to enter a username and password. This information is often provided in the printer’s manual or available from your network administrator.
- Navigate the web interface:
- Use the web interface to adjust settings, manage print jobs, update firmware, and implement security measures for network protection.
By effectively utilizing the web interface, organizations can look forward to maximizing printer performance while ensuring network security, which is imperative against the backdrop of the future of enhanced printer security leveraging cloud-based monitoring. This digital gateway allows for comprehensive management and a step towards a more interconnected and efficient environment.
Remember, while making any changes to your printer settings via the web interface, it’s essential to ensure that you do not compromise the printer’s or network’s security. Regularly updating passwords and keeping firmware up to date are good practices in this regard.
Configuring Network Settings on Konica Minolta
Network configuration is a crucial step in setting up your Konica Minolta printer for efficient and secure operation. To begin, ensure the printer is connected to the local network via an Ethernet cable or Wi-Fi. Access the printer’s interface by following these steps:
- Navigate to the printer’s control panel.
- Press the “Menu” or “Utility” button to access the settings.
- Choose “Network Settings” or a similar option, which may be under a “Settings” or “Administrator Settings” submenu depending on the model.
For static IP address setup:
- Select “TCP/IP Settings” and then “IPv4 Settings.”
- Choose “Static” to manually assign an IP address.
- Enter the desired IP Address, Subnet Mask, and Gateway that corresponds with your network configuration.
For DHCP (Dynamic Host Configuration Protocol):
- Instead of “Static,” select “DHCP” to allow your network to automatically assign an IP address to the printer.
- Confirm that the DHCP function is enabled on your network’s router.
Once the IP address is set:
- Press “OK” to save the changes.
- Print a configuration page or check the printer display to confirm the new network settings are in effect.
For advanced security and monitoring:
- Enable network security settings such as firewall rules and IP filtering directly through your Konica Minolta’s interface.
- Consider integrating the printer with cloud-based printer monitoring systems to maximize printer performance and enhance security.
- Set up printer counter and alert software to monitor usage and receive updates on printer status, ensuring you maximize efficiency.
By taking the time to accurately configure your network settings, you benefit from the top advantages of cloud-based printer monitoring, preparing for the future of enhanced printer security. This proactive approach helps in maximizing printer performance while maintaining robust network security.
Assigning a Static IP Address to Your Konica Minolta Printer
In the world of printers, maintaining a stable network connection is crucial for maximizing printer performance and ensuring network security. Assigning a static IP address to your Konica Minolta printer models, such as the 215, 226, 206, 205i, or 225i, can greatly contribute to these goals.
The process of assigning a static IP address to a Konica Minolta printer involves several steps:
- Access Printer’s Menu: Begin by accessing the printer’s menu through the control panel on the device. Look for the network settings option.
- Navigate to Network Settings: Within the network settings, search for TCP/IP or IP address settings. This is where you will be entering the static IP address information.
- Manual IP Configuration: Choose the option to manually configure the IP address. Automatic settings (DHCP) should be disabled to ensure the printer maintains the same IP address continuously.
- Enter the Static IP Address: Enter the IP address you wish to assign to the printer. Ensure that the address you choose does not conflict with other devices on the network.
- Subnet Mask and Gateway: Along with the IP address, you will also need to enter the correct subnet mask and default gateway. These are usually provided by the network administrator or can be found in the router settings.
- Save and Confirm: After entering all the required details, confirm and save the settings. It’s essential to ensure that the information is accurate to prevent any network conflicts.
- Restart the Printer: For the changes to take effect, you may need to restart your Konica Minolta printer. This allows the printer to reinitialize with its new network settings.
Setting up a static IP address can also pave the way for the future of enhanced printer security. By leveraging cloud-based monitoring systems, administrators can better manage and monitor printer activity, receive alerts for potential issues, and maximize efficiency with printer counter and alert software.
By following these steps, users will enjoy the top benefits of using cloud-based printer monitoring systems, and contribute to a more stable and secure network for their printing needs.
Testing the Connection and Troubleshooting Common Issues
Once a Konica Minolta printer—be it model 215, 226, 206, 205i, or 225i—is set up on a network, it is vital to ensure that it is connected properly and configured to maximize efficiency with printer counter and alert software. Testing the connection can confirm if the setup has been successful and that users are ready to enjoy the top benefits of using cloud-based printer monitoring systems.
To test the printer connection, follow these steps:
- Access the printer’s control panel and navigate to the network settings.
- Select the ‘Print Test Page’ option to send a test print to the printer.
- If the print is successful, the printer is connected properly to the network.
If encountering issues, the following troubleshooting steps can help resolve common problems:
- Check Network Cables and Connections: Ensure that all cables are securely connected, and the printer is on the correct network.
- Verify IP Settings: Confirm that the printer’s IP address matches the network’s IP range. Incorrect IP settings can lead to communication failures.
- Update Printer Drivers: Outdated or incorrect drivers can prevent printing. Make sure the latest drivers are installed on all computers that need access to the printer.
- Firewall and Security Settings: Verify that firewall or network security settings are not blocking the printer. Maximizing printer performance while ensuring network security is essential for effective operation.
- Reboot the Printer and Devices: Sometimes, simple rebooting can resolve connectivity problems. Turn off the printer and computer, wait a moment, then turn them back on.
In cases where these steps do not remedy the issue, it is advisable to consult the printer’s manual or reach out to Konica Minolta support for assistance. Remember, the future of enhanced printer security leveraging cloud-based monitoring is contingent upon a stable and secure network connection.
Installing Printer Drivers on Workstations
For organizations aiming to maximize efficiency with printer counter and alert software, ensuring that each workstation can communicate effectively with a Konica Minolta printer is essential. With the top benefits of using cloud-based printer monitoring systems and keeping an eye on the future of enhanced printer security leveraging cloud-based monitoring, the installation of proper printer drivers becomes a crucial step. To maintain maximizing printer performance while ensuring network security, follow these steps to install printer drivers on workstations:
- Identify the Correct Driver:
- Navigate to the Konica Minolta official website and locate the ‘Support & Downloads’ section.
- Enter your printer’s model number (e.g., 215, 226, 206, 205i, 225i) to find the specific drivers for your device.
- Download the Driver:
- Choose the driver that corresponds with your workstation’s operating system.
- Download the appropriate driver file to your workstation.
- Prepare for Installation:
- If necessary, unzip or extract the driver files to a known location on your workstation.
- Before proceeding, close all running programs to ensure a smooth installation process.
- Install the Driver:
- Run the installation file and follow the on-screen instructions.
- During the installation process, you may be prompted to select connection type; choose ‘Network’ to connect via an IP address.
- When prompted, input the IP address that has been assigned to the printer on the network.
- Complete the Setup:
- Follow all additional prompts during the installation wizard to appropriately configure the printer settings.
- Test the Installation:
- Print a test page from the workstation to confirm the connection to the printer is active and working properly.
- Configure Printer Monitoring Software:
- If you’re utilizing cloud-based monitoring and printer counter/alert software, make sure to complete any additional configuration required by the software provider.
By following these steps, IT administrators and users alike can ensure smooth integration of their Konica Minolta printers into the network, thus maintaining productive workflows and aligning with the growing trends towards comprehensive and secure printer management systems.
Setting Up Printing Preferences and Security Features
When configuring a Konica Minolta device in an office setting, establishing printing preferences and ensuring robust security features are critical. Configuring these settings is quintessential for maximizing printer performance while guaranteeing the safeguard of sensitive data. Likewise, integrating top benefits of using cloud-based printer monitoring systems can significantly streamline your workflow.
To begin with the preferences, access the printer’s web interface by entering the IP address in a web browser. Once logged in:
- Navigate to the settings section where you can customize the print settings.
- Choose preferred default settings for print quality, duplex (double-sided) printing, and paper size.
- With the maximize efficiency with printer counter and alert software feature enabled, keep track of printer usage and receive notifications for maintenance.
For bolstering security, one should:
- Set strong administrator passwords, changing them from the default to prevent unauthorized access.
- Enable user authentication or account tracking to ensure that only authorized personnel can use the printer functions.
- Configure the firewall in the network settings to limit the printer’s exposure to potential threats.
- Update the printer’s firmware regularly to patch any security vulnerabilities.
In an era where the future of enhanced printer security leveraging cloud-based monitoring is advancing, these features ensure not only efficiency but also a high level of data protection. Using cloud-based systems, stay ahead of threats by receiving real-time updates and remote diagnostics which can preemptively identify and resolve issues before they escalate.
Maintaining Your Networked Konica Minolta Printer
Maintaining a networked Konica Minolta printer, such as models 215, 226, 206, 205i, or 225i, means adhering to best practices that ensure the device operates efficiently and securely. The integration of cutting-edge technologies, like cloud-based printer monitoring and security systems, brings numerous advantages to printer maintenance, including:
- Maximizing Printer Performance: Regularly update your printer’s firmware to the latest version to take advantage of improvements and security patches. Users should regularly check Konica Minolta’s website or support channels to download and install firmware updates.
- Ensuring Network Security: Secure your printer within the network by changing default passwords, configuring user authentication, and setting up a firewall. It is crucial to establish strong encryption for data transmission to prevent unauthorized access.
- Leveraging Cloud-Based Monitoring: By utilizing the top benefits of using cloud-based printer monitoring systems, you can anticipate maintenance needs, streamline resource management, and receive timely alerts for issues such as low toner levels or paper jams.
- Increasing Efficiency with Counter and Alert Software: Maximize efficiency with printer counter and alert software by tracking usage patterns and scheduling maintenance tasks accordingly. This helps prevent unexpected downtimes and extends the lifespan of the printer.
- Anticipating the Future of Printer Security: Stay informed about the future of enhanced printer security leveraging cloud-based monitoring. Adapt to new threats proactively by subscribing to security bulletins and engaging in ongoing education on network security best practices.
Proper maintenance of your Konica Minolta printer is a continuous process. It requires diligent attention to both the physical components and the network environment in which it operates. By staying up-to-date with the latest advancements in printer technology and security measures, businesses can ensure their printers serve them effectively and securely for years to come.
Advanced Networking: Connecting to Multiple Networks
When integrating Konica Minolta printers such as the 215, 226, 206, 205i, or 225i into a sophisticated network environment, understanding and precisely configuring IP addresses is crucial. For businesses employing these devices, this enables maximizing printer performance while ensuring network security—a key aspect in the future of enhanced printer security leveraging cloud-based monitoring.
Networking capabilities of these printers allow them to connect to multiple networks simultaneously, offering one of the top benefits of using cloud-based printer monitoring systems. This enables seamless transitions between corporate networks, guest internet, and dedicated print networks, ensuring secure and efficient print operations.
To configure a Konica Minolta printer for multi-network connectivity, follow these steps:
- Access the Printer’s Web Interface: Ensure the printer is connected to the primary network and navigate to its web interface by entering its current IP address into a web browser.
- Navigate to Network Settings: Find the network or interface settings menu, often located within the ‘Admin’ or ‘Network’ tabs.
- Configure Multiple IP Addresses: Assign the printer multiple IP addresses, each corresponding to a different network. This might involve setting up virtual LANs (VLANs) if supported.
- Enable Network Protocols: Activate necessary network protocols. For multi-network printers, both IPv4 and IPv6 might be utilized depending on network infrastructure.
- Set Up Cloud-Based Monitoring: To maximize efficiency with printer counter and alert software, integrate the printer with cloud-based monitoring systems to enable real-time tracking and alerts for maintenance or supply needs.
- Check Firewall and Security Settings: Ensure the firewall settings on the printer and the network allow for communication between the different networks without compromising security.
- Test Connectivity: Ensure that the printer can be accessed and can print successfully from all connected networks.
By meticulously following the steps above, businesses can leverage their Konica Minolta printers to enhance operational efficiency and embrace advanced networking functionalities. These procedures will help unlock the full potential of networked printers while maintaining robust security protocols across multiple network environments.
Conclusion: Optimizing Your Konica Minolta Experience for Office Efficiency
Maximizing office efficiency with your Konica Minolta printers encompasses more than just successfully navigating an IP address setup. It involves leveraging advanced features and integrations that enhance performance while safeguarding your network. Utilize the top benefits of using cloud-based printer monitoring systems to streamline workflow and ensure your devices are operating optimally.
- Keep regular tabs on printer performance through cloud-based monitoring, which provides real-time insights and analytics.
- Enhance your security posture with the future of enhanced printer security, allowing you to detect potential threats and vulnerabilities through continuous monitoring.
- Implement printer counter and alert software to stay ahead of maintenance needs and supply replenishment, ensuring minimal downtime.
- Embrace the convenience of being able to print from anywhere within your network by setting up multiple devices on the same network segment.
- Capitalize on user authentication features to control access and maintain document confidentiality.
Maximizing printer performance while ensuring network security doesn’t have to be a daunting task. By integrating these features into your daily operations, you enhance not only the productivity of your staff but also the longevity of your Konica Minolta printers. It is crucial to continually assess your office’s needs and adapt your printer setup and management accordingly, to keep pace with the evolving technology landscape. With the right approach, your office can enjoy seamless printing services that contribute to a more efficient, secure, and productive work environment.